
Tip - what an adjustment layer is and how to add one
A short tip on adjustment layers. Change colour, brightness and contrast without touching the picture itself, hide the change with an eye icon, and undo it later. Free in your browser.
Say a photo looks too cold and you want it warmer. If you change the pixels directly, the original is gone. An adjustment layer sits above the picture and changes how it looks. The picture underneath stays the way it was, so you can hide the adjustment, change it or delete it.
Add one in a minute
- Open a picture in the editor with
File ▸ Open…. - Choose
Layer ▸ New Adjustment Layer ▸ Photo Filter. A small window opens with sliders and a live preview. - For a warm look, try Color red 236, Color green 138, Color blue 0 and Density 0.45, then press OK.
- Add another:
Layer ▸ New Adjustment Layer ▸ Brightness/Contrast, with Brightness 12 and Contrast 10.
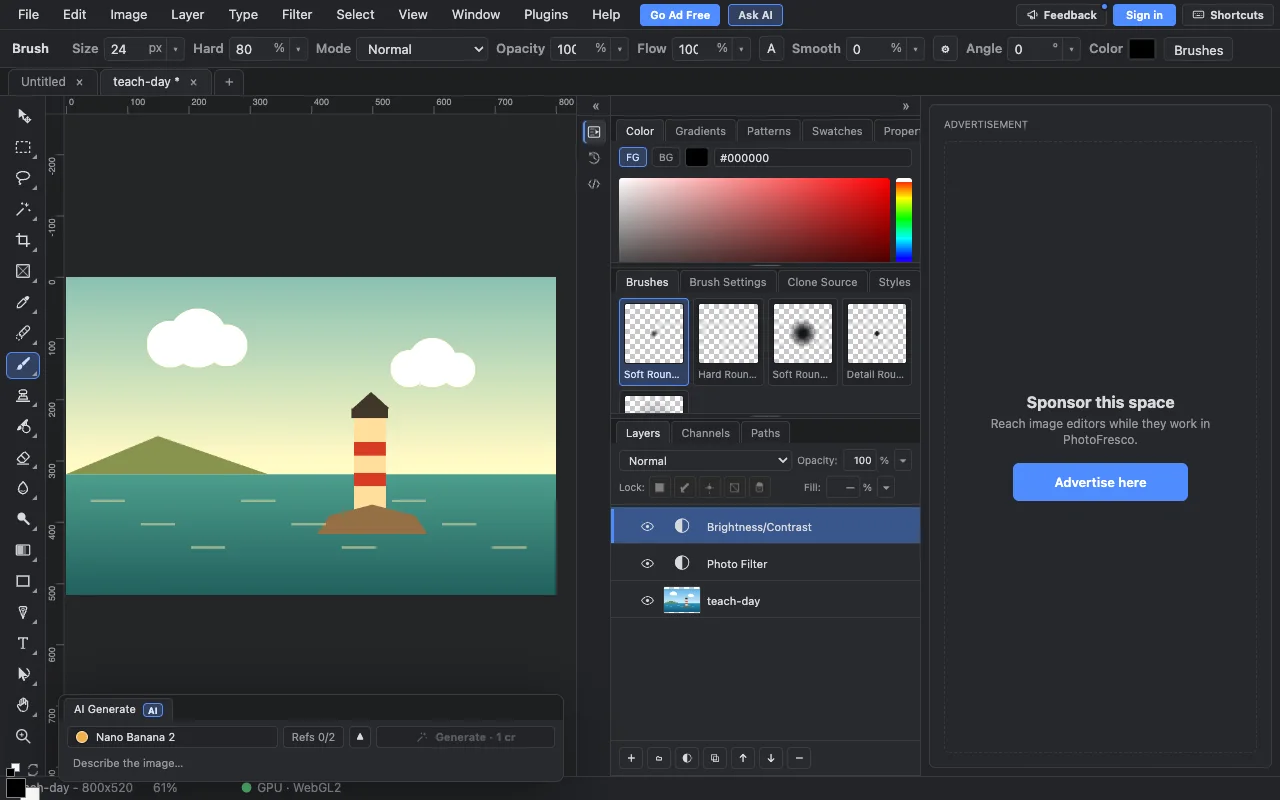
- Click the eye icon next to an adjustment layer to hide it. The original look comes back. Click again to show it.
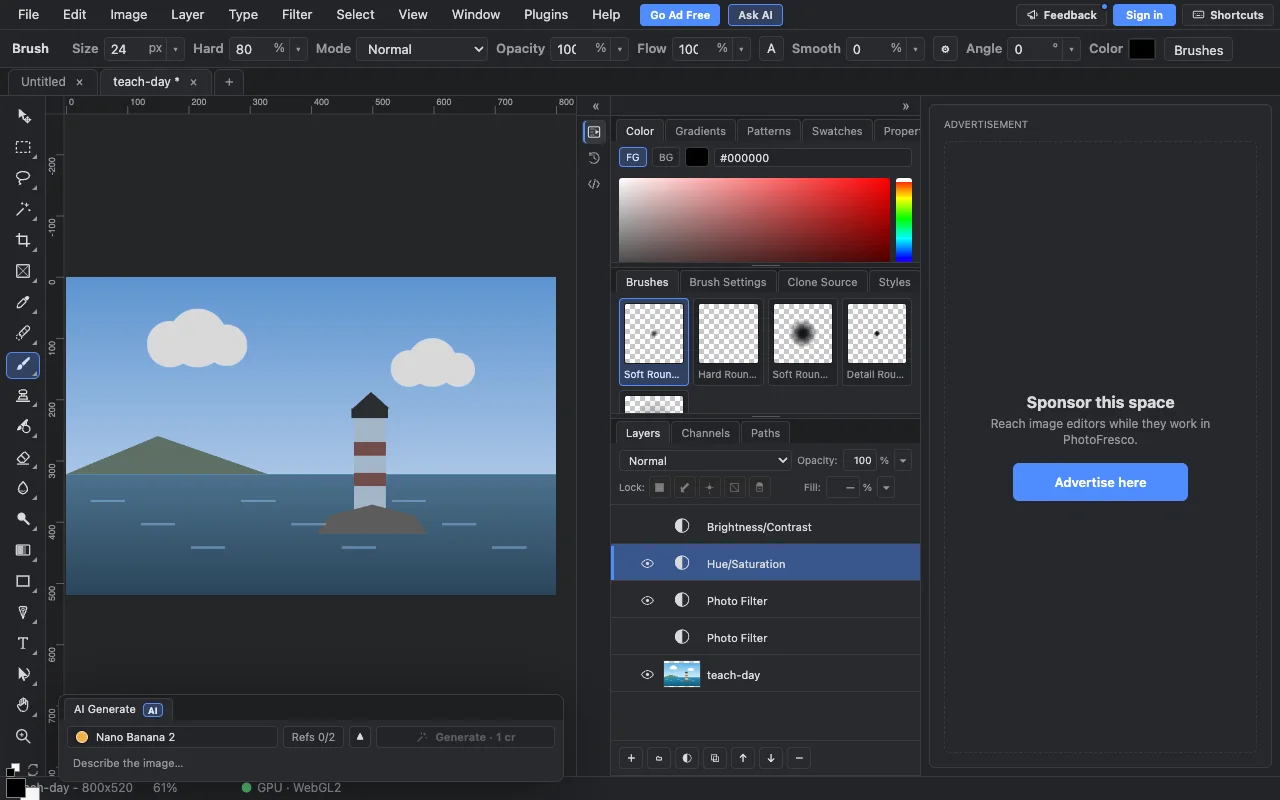
- Want another mood? Hide the warm layers and add a cold one, such as a blue Photo Filter and a Hue/Saturation layer with Saturation -45.
Good to know
- An adjustment layer changes everything under it. Put it at the top to affect the whole picture.
- The menu has many more adjustments, for example Levels, Curves, Vibrance, Color Balance and Black & White.
- A PSD keeps adjustment layers editable. A PNG or JPEG export is a flat copy.
Next
- Tip: what layers are
- Layers, masks and selections lists every adjustment
- For a class: Lesson plan: how editing changes a photo's story
Last updated