
Tip - what layers are and how to use them
A one-minute tip on layers in a photo editor. Stack pictures, text and shapes, hide any of them with the eye icon and keep every edit separate, in your browser for free.
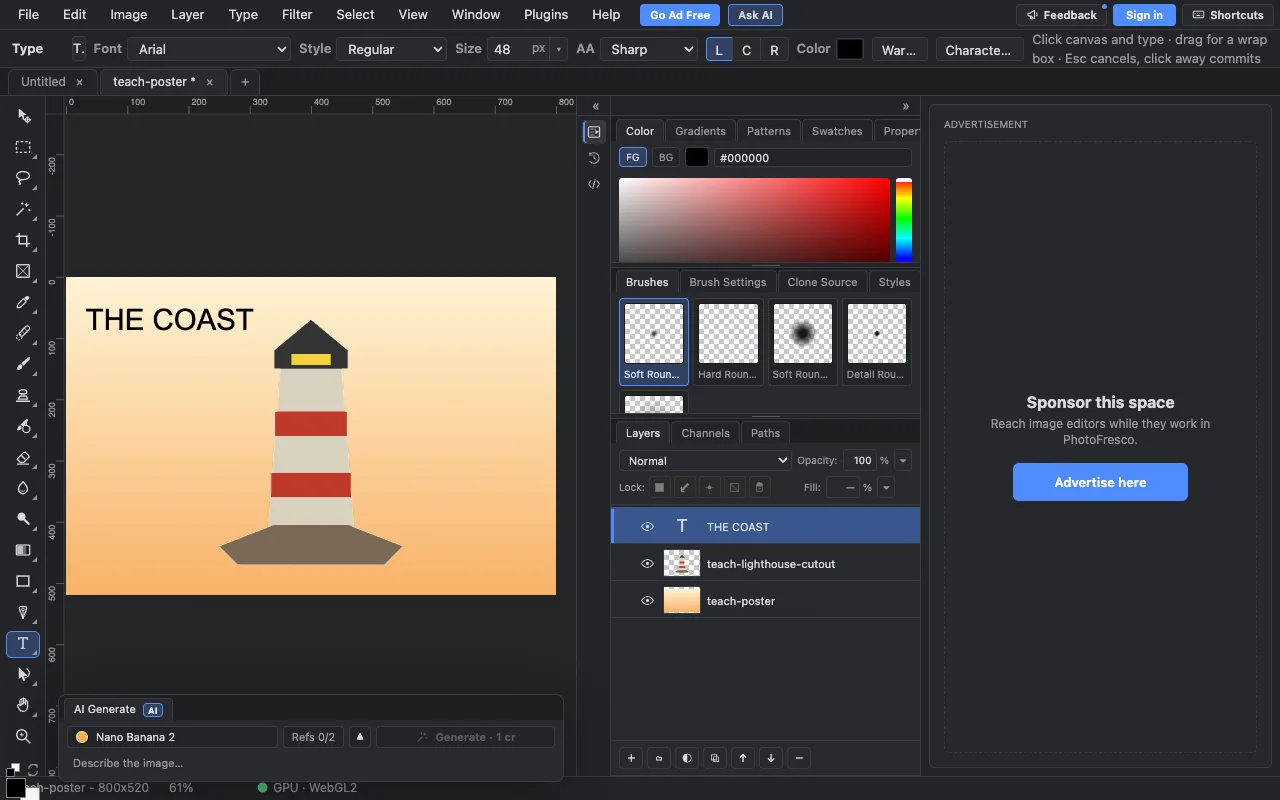
Say you make a poster with a sky, a lighthouse and a title. If all three were painted onto one flat picture, moving the title would mean repainting the sky behind it. With layers, each part lives on its own sheet, and the sheets stack like clear plastic. You can move, hide or change one sheet without touching the others.
Try it in two minutes
- Open the editor and choose
File ▸ Open…. Open any picture. It becomes the bottom layer. - Choose
File ▸ Import ▸ Image as Layer…and pick a second picture. It appears above the first one and covers it. - Look at the Layers panel on the right. Each row is one layer, and the top row is the top of the stack.
- Click the eye icon next to the top layer. It disappears from the picture, but it is not deleted. Click the eye again and it comes back.
- Choose the Type tool (T), click on the picture and type a title. The text becomes its own layer.
Why it matters
- A mistake costs one layer, not the whole picture. Hide the layer or undo.
- You can change your mind later. The title stays editable text until you choose to flatten it.
- A PSD keeps the layers. Save with
File ▸ Save As…to keep every layer for next time. A PNG or JPEG is a flat copy.
Next
- Hide part of a layer without erasing it: Tip: layer masks
- Change colour and light without touching the pixels: Tip: adjustment layers
- The full picture: Layers, masks and selections
- For a class: Lesson plan: photo montage with layers and a layer mask
Last updated