
Lesson plan - cut out a subject and use it in a poster
A lesson plan for secondary school. Students cut a subject out of a plain background, export a transparent PNG and use it in a poster or infographic in a free browser editor.
Say students need a clean picture of an object for a poster, but the picture has a white background that clashes with the colours. In this lesson they select the background, hide it with a mask, save the object as a transparent PNG, and place it on a poster of their own.
This plan uses PhotoFresco, which runs in the browser with no installation and no student accounts. See PhotoFresco for teachers for what the free version does and records.
At a glance
| Level | Secondary school, about ages 12 to 16 |
| Time | One or two lessons of about 50 minutes |
| Subjects | ICT or digital skills, art and design, media, any subject that needs a poster or infographic |
| Goals | Students can select a plain background with the Magic Wand, turn the selection into a layer mask, export a transparent PNG and explain why a PNG keeps transparency. They can place the cutout on a background and add a title. |
| You need | A computer or Chromebook per student or pair and the practice images below. |
| Practice images | Lighthouse on white (the subject) and poster background. Both are original drawings made for this lesson. For their own subject, students need a picture with a plain, even background, for example an object photographed on white paper. |


Before the lesson
- Try the steps yourself once (about 15 minutes).
- Give students the two practice images, or ask them to photograph a small object (a mug, a shoe, a plant) on a sheet of white paper. Ask them not to photograph people.
- Say in advance that edges are the hard part. A plain background cuts out cleanly. Hair, fur and busy backgrounds do not.
Steps
- Choose
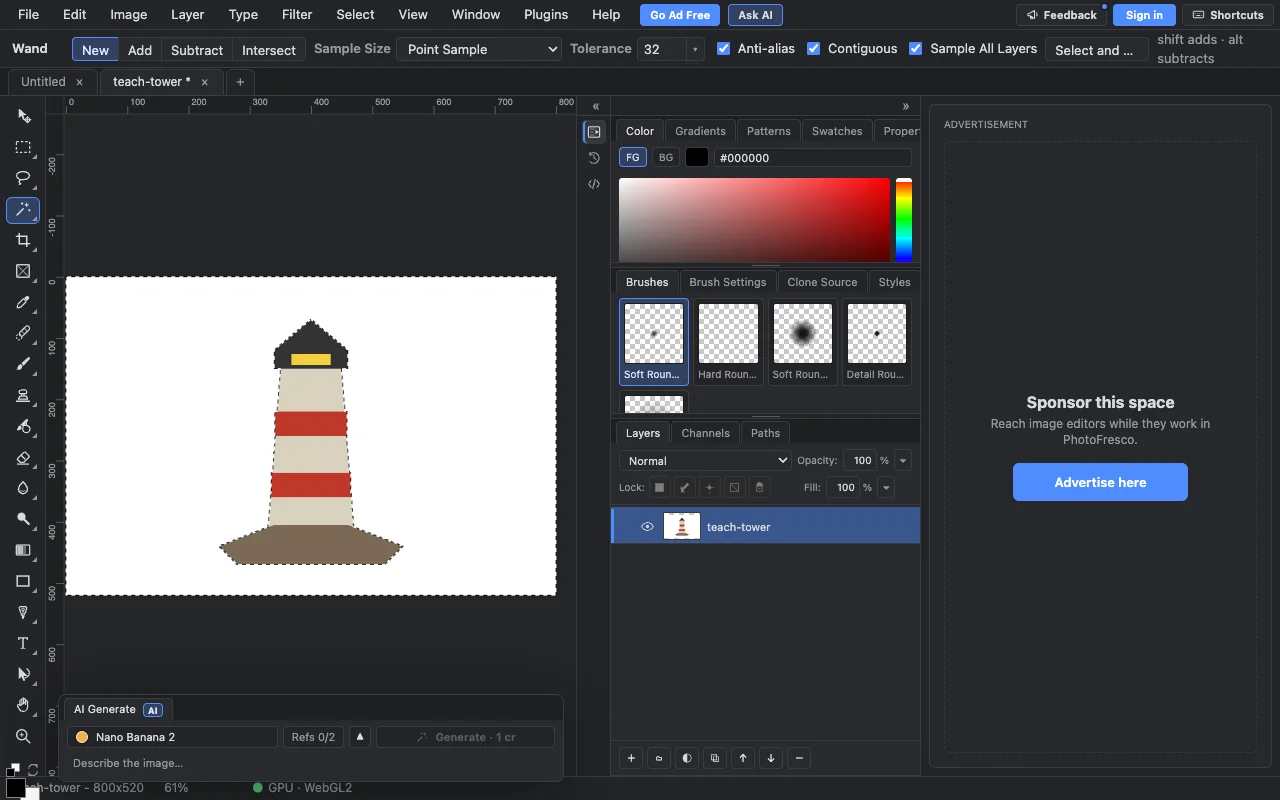
File ▸ Open…and open teach-tower.png. - Choose the Magic Wand (W) and click the white area away from the lighthouse. A moving dotted line (the "marching ants") shows what is selected.
- Choose
Select ▸ Inverse. Now the lighthouse is selected and the background is not. - Choose
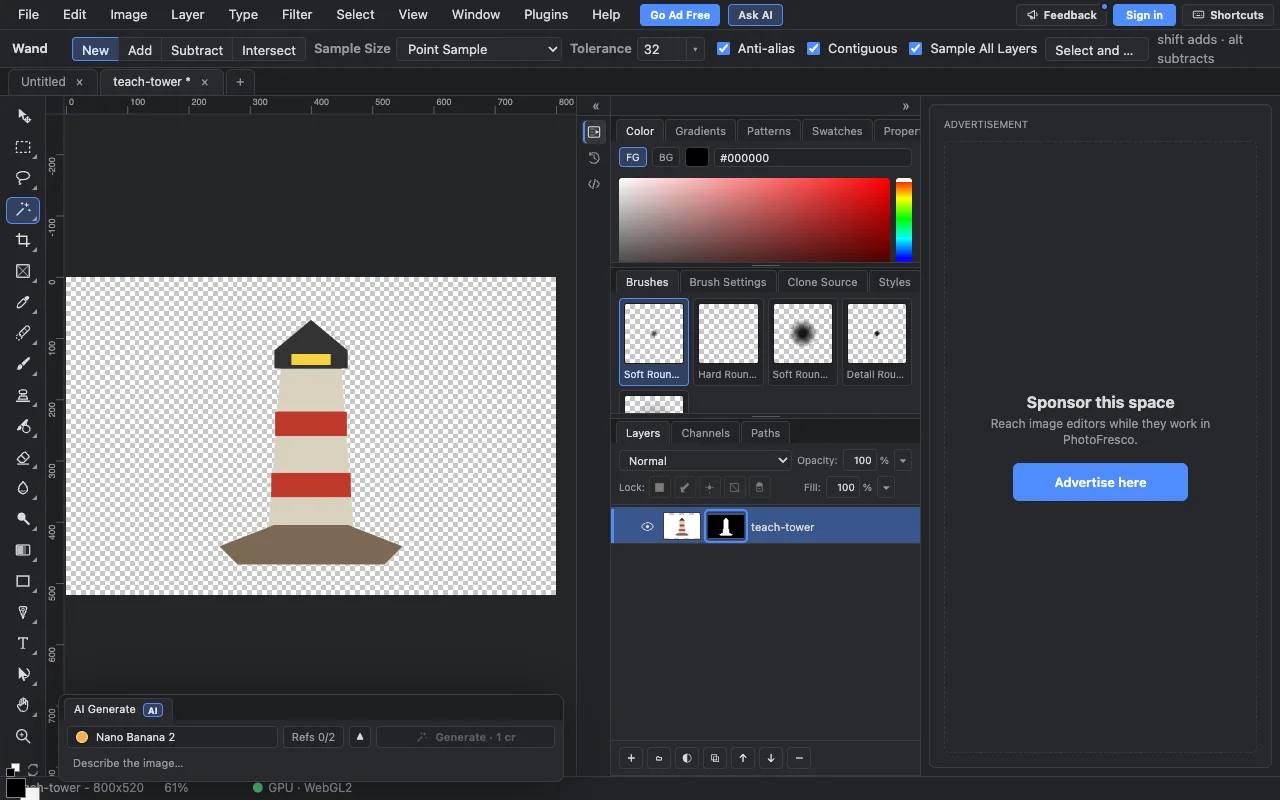
Layer ▸ Layer Mask ▸ Add, thenSelect ▸ Deselect. The checkerboard around the lighthouse means that area is transparent.
- Choose
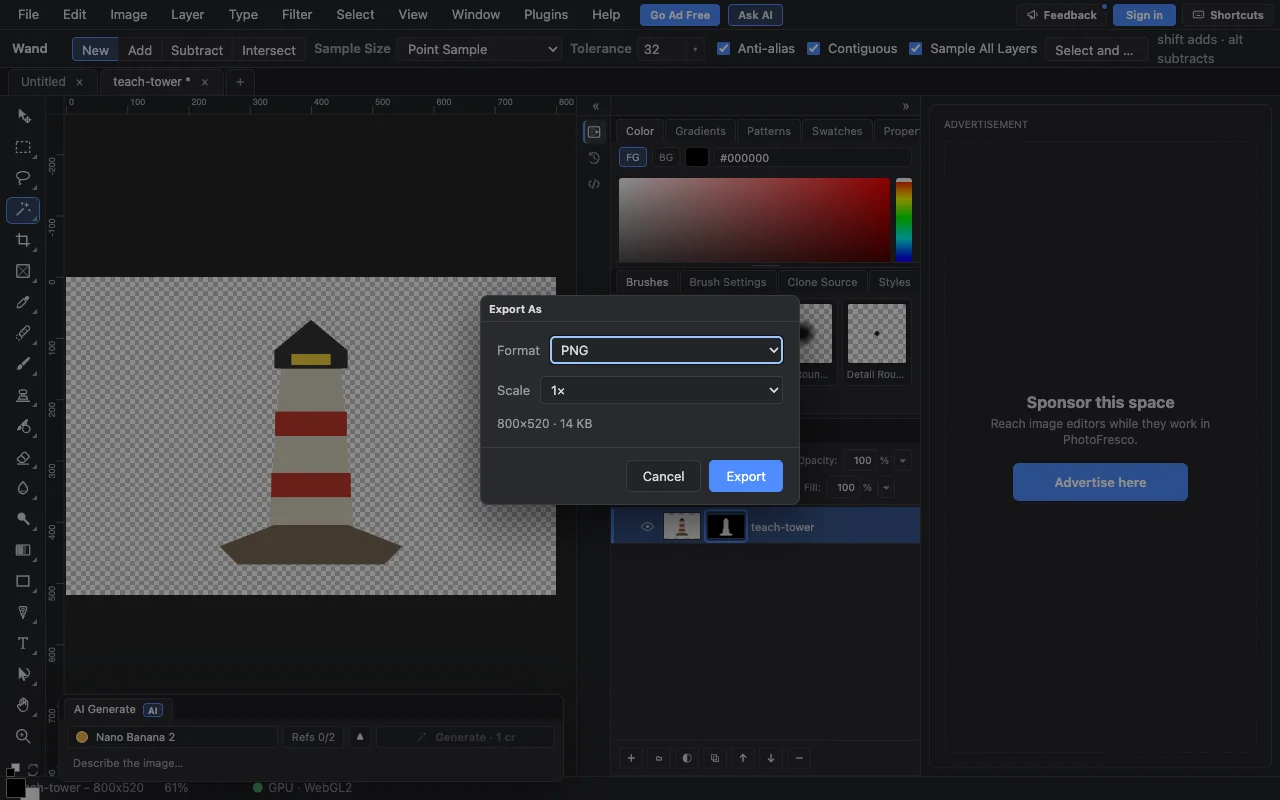
File ▸ Export ▸ Export As…, pick PNG and click Export. A PNG can keep transparency. A JPEG cannot: it fills transparent areas with a solid colour.
- Open the poster background:
File ▸ Open…and choose teach-poster.png. - Add the cutout:
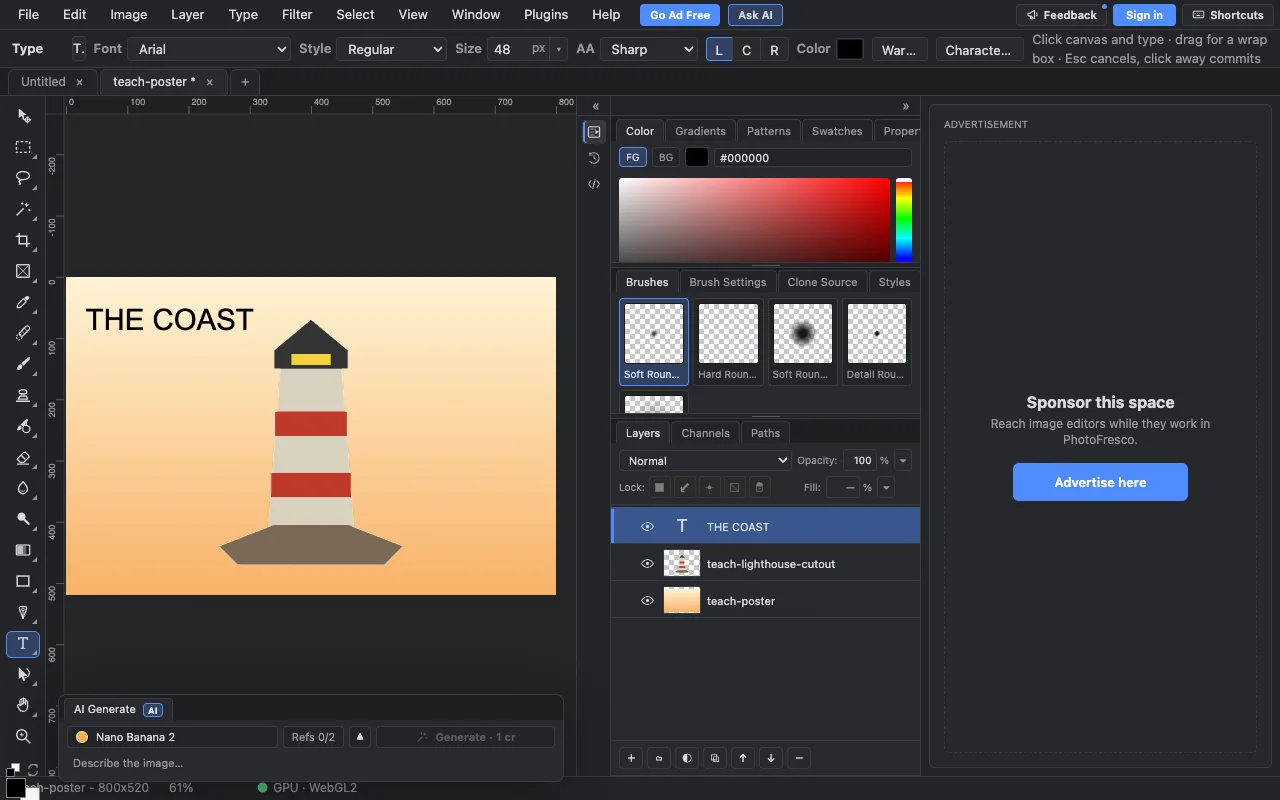
File ▸ Import ▸ Image as Layer…and pick the PNG you just exported. It lands in the middle of the poster, with the poster colours visible around it. - Choose the Type tool (T), click on the poster, type a title and press Ctrl+Enter (Cmd+Enter on a Mac) to finish.
- Export the poster as a PNG for hand-in and save a PSD with
File ▸ Save As…so the layers stay editable.
Example task (student sheet)
Task: a poster with a cutout.
- Cut a subject out of its plain background and export it as a transparent PNG.
- Put it on a coloured background and add a title and one line of information (for example a fact for an infographic).
- Export the poster as a PNG and save the PSD.
Check yourself: Is the checkerboard visible around your subject? Is the edge clean? Would a JPEG have kept the transparency?
Differentiation
- Starters: use the lighthouse, follow the steps in order, and fix only the title text.
- On level: photograph an own object on white paper, cut it out and make the poster.
- Advanced: fix a rough edge by painting on the mask (white brings pixels back, black hides more), add a second cutout, and write a short note on what makes a cutout look natural or fake.
If something goes wrong
- The Magic Wand selected part of the object. Undo, lower the Tolerance in the bar at the top, and click again.
- A white halo is left around the object. Paint black on the mask along the edge with a small hard brush.
- The cutout has a white background on the poster. The export was a JPEG, or the mask was not added. Check for the checkerboard before exporting.
Check understanding
- Why did we add a mask instead of deleting the background?
- Which file types keep transparency, and which do not?
- What kind of picture is easy to cut out, and what kind is hard?
Links
- How to remove the background from an image for a one-person walkthrough
- Lesson: photo montage with layers and a layer mask
- For teachers
Last updated