
Lesson plan - photo montage with layers and a layer mask
A two-lesson plan for secondary school. Students blend two pictures into one montage with layers and a layer mask in a free browser editor. Steps, example task, practice images and differentiation.
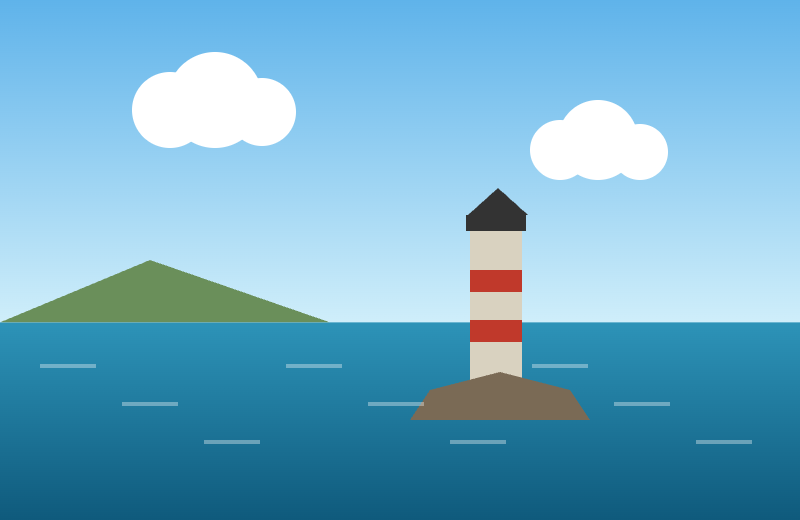
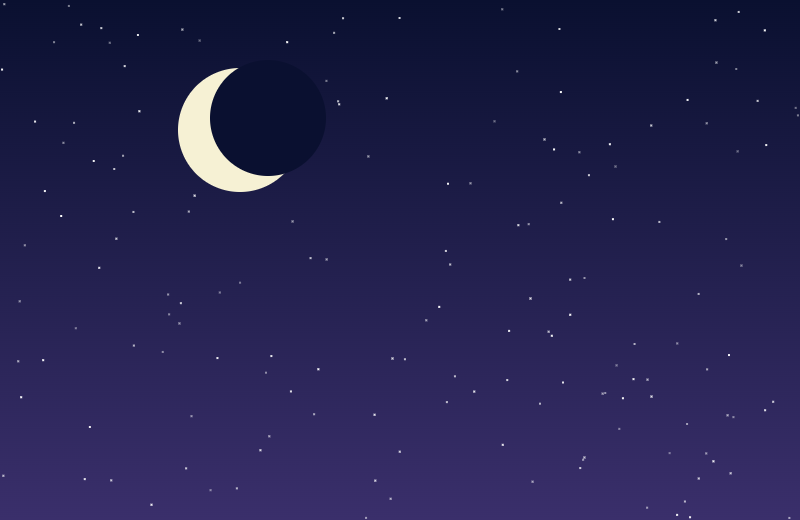
Say your class has two photos of the same harbour, one by day and one at night, and the task is to make one picture that shows both. Students stack the pictures as layers, then hide part of the top layer with a layer mask instead of erasing it. A mask is safe: if a student hides too much, they paint it back.
This plan uses PhotoFresco, which runs in the browser. No installation and no student accounts are needed. Read PhotoFresco for teachers first for what the free version does and what it records.
At a glance
| Level | Secondary school, about ages 12 to 16 |
| Time | Two lessons of about 50 minutes |
| Subjects | ICT or digital skills, art and design, media |
| Goals | Students can open a picture and add a second one as a layer. They can add a layer mask and paint on it to show and hide parts of the layer. They can export the result as a PNG and keep an editable PSD copy. |
| You need | A computer or Chromebook per student or pair, a current Chrome, Edge or Firefox, and the two practice images below. A mouse works better than a trackpad for painting. |
| Practice images | Harbour by day and night sky. Both are original drawings made for this lesson, so there are no people and no copyright questions. |
Before the lesson
- Open the editor once and try the steps yourself. It takes about ten minutes.
- Put the two practice images where students can reach them (a shared folder or your school learning platform). Students can also use their own landscape photos. Ask them not to use photos of people.
- Tell students that the free version shows an ad panel next to the editor.
Lesson 1: layers and a mask
- Choose
File ▸ Open…and open teach-day.png. This is the bottom layer. - Choose
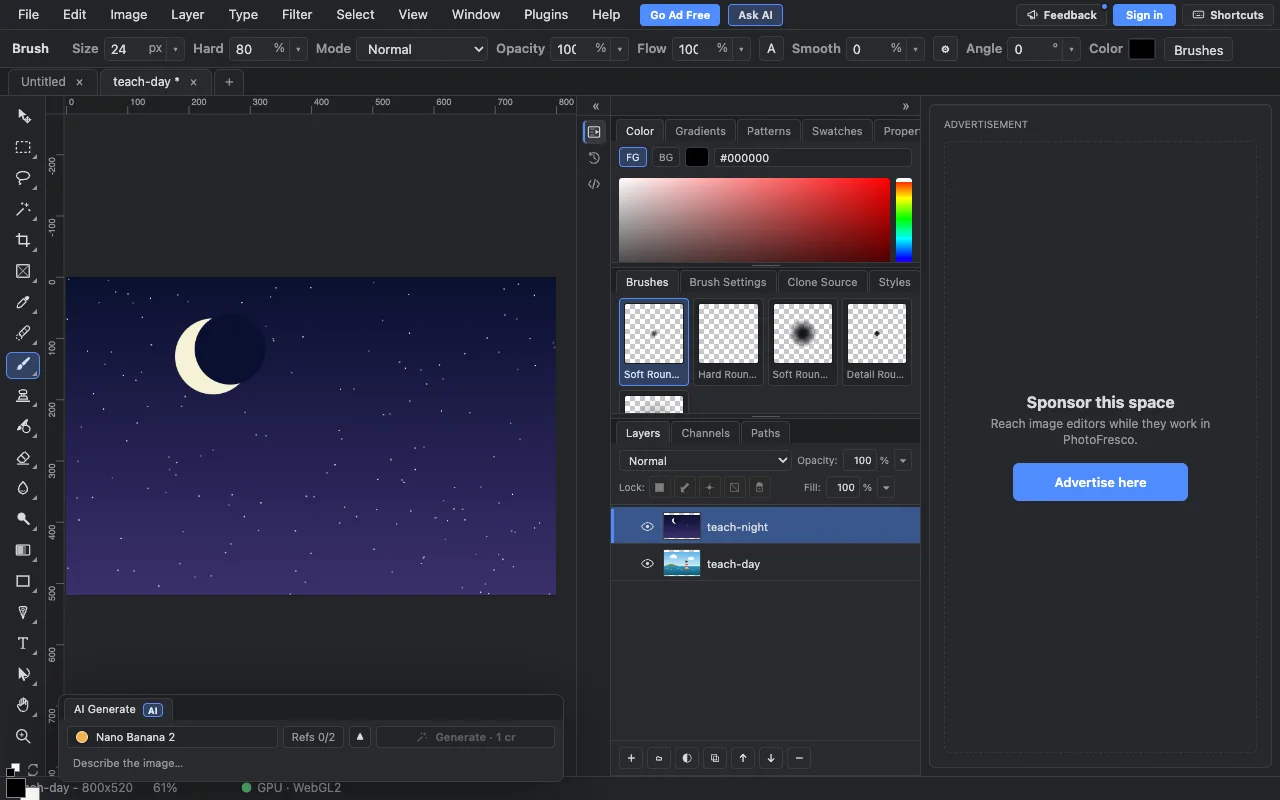
File ▸ Import ▸ Image as Layer…and pick teach-night.png. The night sky now covers the harbour. Look at the Layers panel: there are two rows, and the night picture is on top.
- With the night layer selected, choose
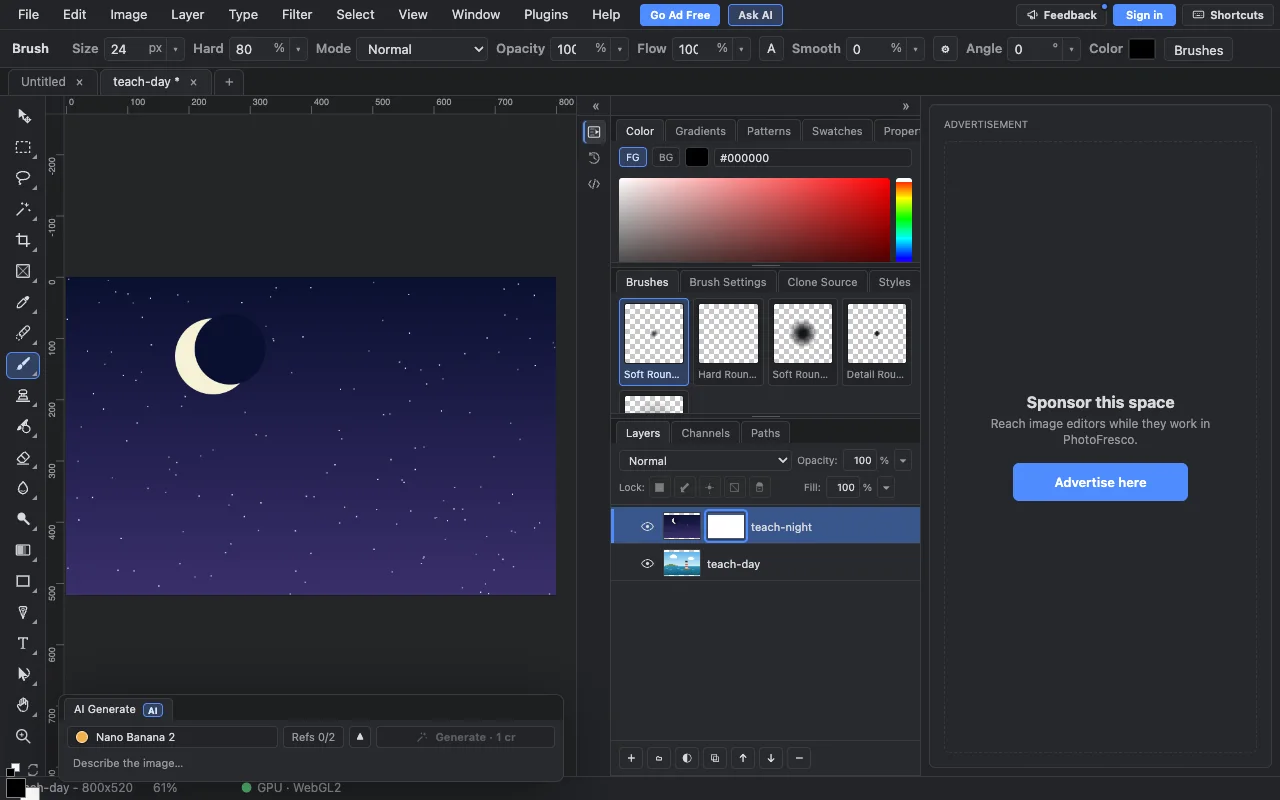
Layer ▸ Layer Mask ▸ Add. A white box (the mask) appears next to the layer's picture. White shows the layer. Black hides it. Click the mask box so it has an outline. That means the mask is what you paint on.
- Choose the Brush (B). In the bar at the top, set Size to about 250 px and Hard to 0, so the edge is soft. Make sure the colour is black.
- Paint across the lower half of the picture. The sea and the lighthouse come back, and the night sky stays at the top. Look at the mask box: it now has a black area where you painted.
- If you hide too much, switch the colour to white (press X to swap black and white) and paint it back, or undo with Ctrl+Z (Cmd+Z on a Mac).
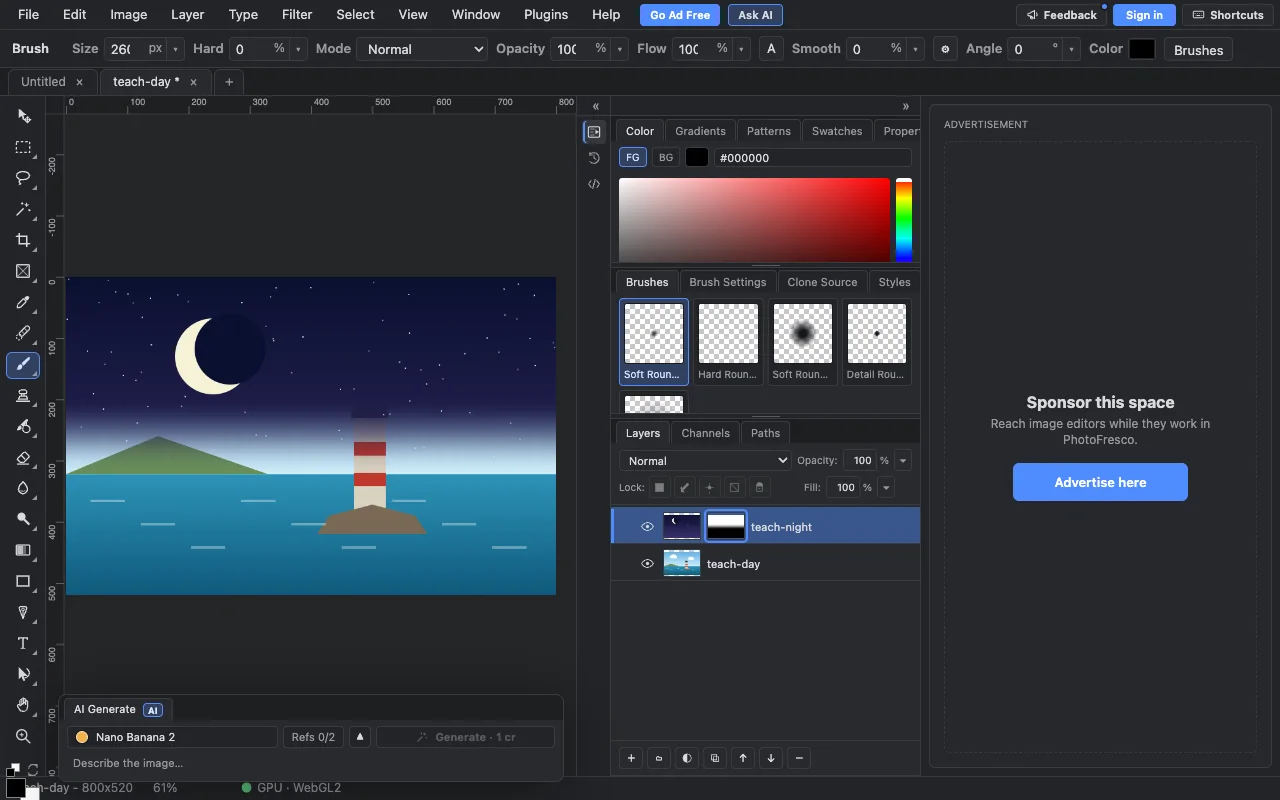
- Choose
File ▸ Export ▸ Export As…, pick PNG and click Export for a picture to hand in. ChooseFile ▸ Save As…for an editable PSD copy that keeps the layers and the mask.
Note on tools: the toolbar also has a Gradient tool. In this version it paints the layer's own pixels and not the mask, so use the Brush for this lesson.
Example task (student sheet)
Print or copy this part.
Task: one picture, two moments.
- Open the harbour by day. Add the night sky as a second layer.
- Add a layer mask to the night layer.
- Use a soft black brush on the mask so the harbour shows at the bottom and the night sky shows at the top. The change should look smooth, not like a hard line.
- Export a PNG. Save a PSD.
Check yourself: Can you point to the part of the mask that is black? Can you explain what would happen if you painted it white?
Lesson 2: own pictures and a second adjustment
Students make a montage from two pictures of their own choice (landscapes, objects, drawings; no people), or repeat the task with a new idea such as a city by day and by night.
- Repeat steps 1 to 7 with new pictures.
- Add a light, dark or colour change on top. Choose
Layer ▸ New Adjustment Layer ▸ Brightness/Contrast. Move the sliders and press OK. The change affects every layer under it. Hide it with the eye icon to compare. - Show the result to a partner. The partner names which part is from which picture and says how they could tell.
Differentiation
- Starters: use the practice images, one mask, and the written steps above. Pair a student who finds painting hard with one who finds it easy and swap roles halfway.
- On level: use their own two pictures and paint the mask with a soft brush.
- Advanced: add a second mask on a third layer (for example a moon or a boat), add a Brightness/Contrast or Hue/Saturation adjustment layer, and write three sentences explaining which choices made the montage believable.
Check understanding
- What is the difference between erasing part of a layer and hiding it with a mask?
- What does white do on a mask? What does black do?
- How could you get back a part you hid by mistake?
- Which file keeps the layers (the PSD), and which one is a flat picture to hand in (the PNG)?
Links
- Layers, masks and selections for more on how layers and masks work
- Lesson: cut out a plain background and make a poster
- Lesson: how editing changes a photo's story
- For teachers
Last updated