
Lesson plan - how editing changes a photo's story
A media literacy lesson for secondary school. Students use adjustment layers in a free browser editor to give one picture two different moods, then discuss how editing changes what a picture seems to say.
Say two students get the same picture of a harbour. One makes it warm and golden, the other makes it grey and cold. Nothing in the scene changed, but the two pictures seem to tell different stories. In this lesson students make both versions with adjustment layers, then talk about what editing does to the way we read a picture.
This plan uses PhotoFresco, which runs in the browser with no installation and no student accounts. See PhotoFresco for teachers for what the free version does and records.
At a glance
| Level | Secondary school, about ages 14 to 18 |
| Time | One lesson of about 50 minutes (add a second lesson for the discussion and written task) |
| Subjects | Media literacy, media and communication, ICT, art and design, photography |
| Goals | Students can add adjustment layers and hide or show them. They can make two versions of one picture with different moods. They can describe, in their own words, how colour and brightness change the message of a picture, and why that matters when they look at pictures in the news and on social media. |
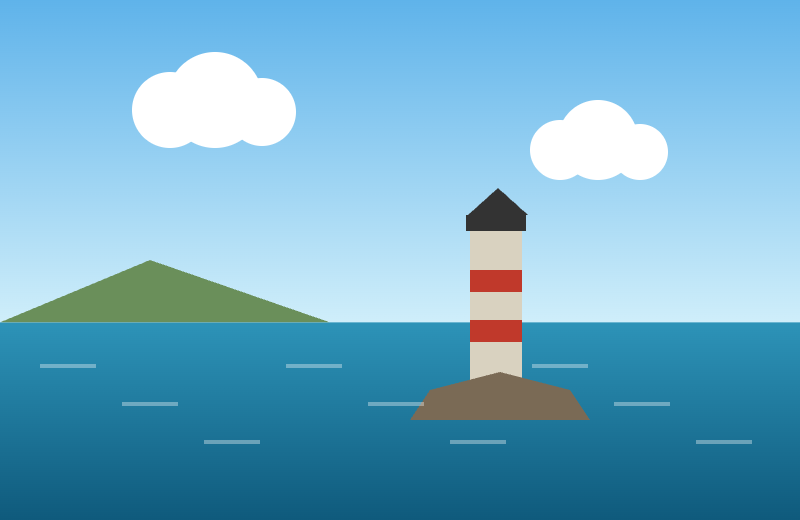
| You need | A computer or Chromebook per student or pair and the practice image: Harbour by day, an original drawing made for this lesson, so there are no people and no copyright questions. |
An adjustment layer in one minute
A normal edit changes the pixels of a picture for good. An adjustment layer sits above the picture and changes how it looks, without touching the picture itself. You can hide it with the eye icon, change its settings later, or delete it. This makes it safe for students to try things.
Before the lesson
- Try the steps yourself once (about 10 minutes).
- Decide whether students use the practice image or an own landscape or object photo. Ask them not to use pictures of people.
Steps
- Choose
File ▸ Open…and open teach-day.png. Look at it together: bright, blue, calm.
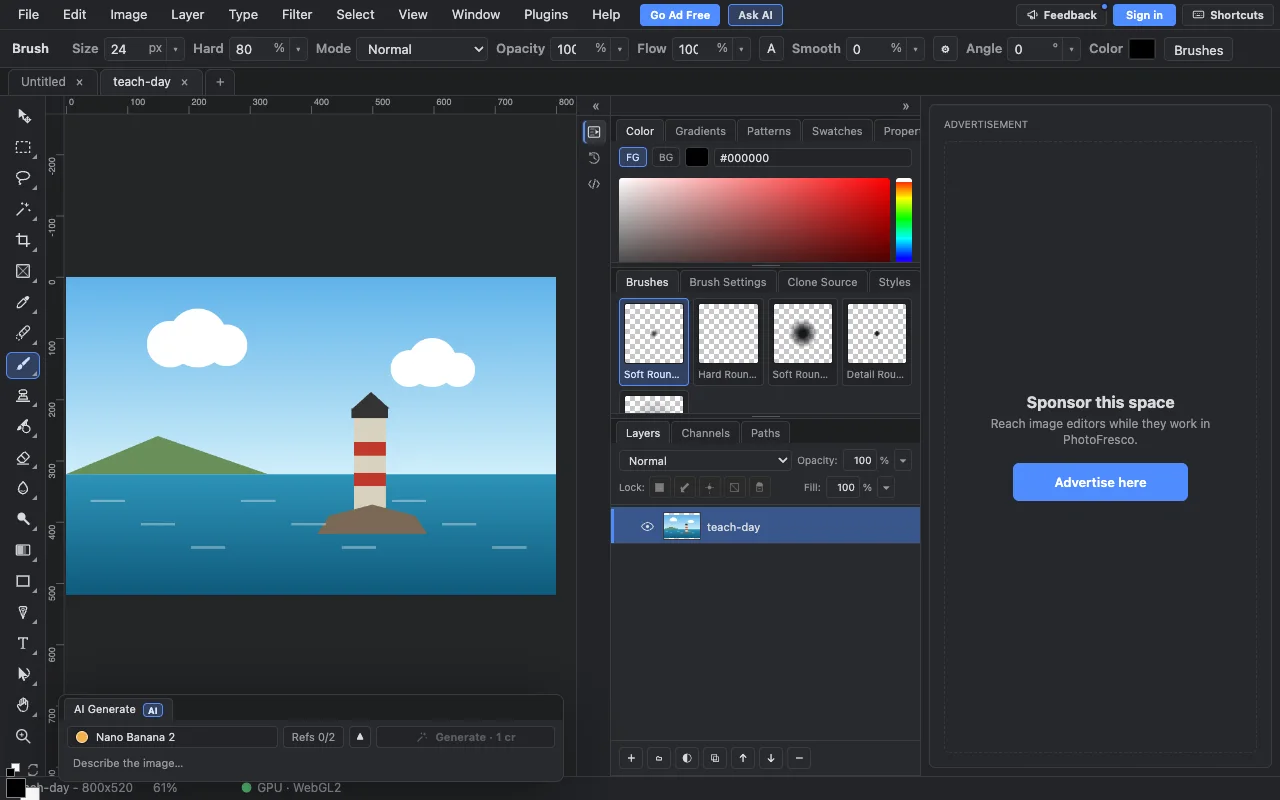
- Choose
Layer ▸ New Adjustment Layer ▸ Photo Filter. A small window opens with sliders and a live preview. Try Color red 236, Color green 138, Color blue 0 and Density 0.45, then press OK. The picture turns warm. - Choose
Layer ▸ New Adjustment Layer ▸ Brightness/Contrast, set Brightness to 12 and Contrast to 10, and press OK. In the Layers panel there are now two adjustment layers above the picture.
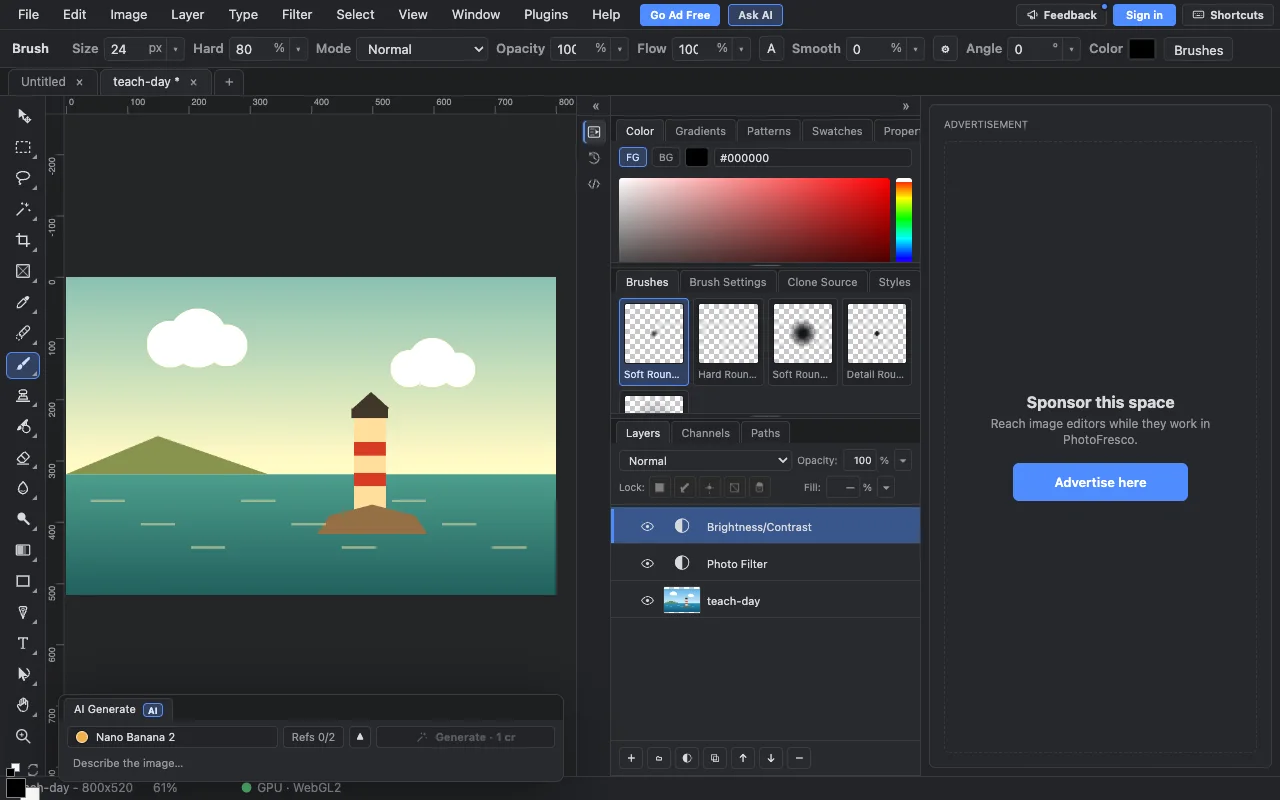
- Click the eye icon next to each adjustment layer to hide it. The original comes back. Show it again. This is the main idea of the lesson: the picture under the layers never changed.
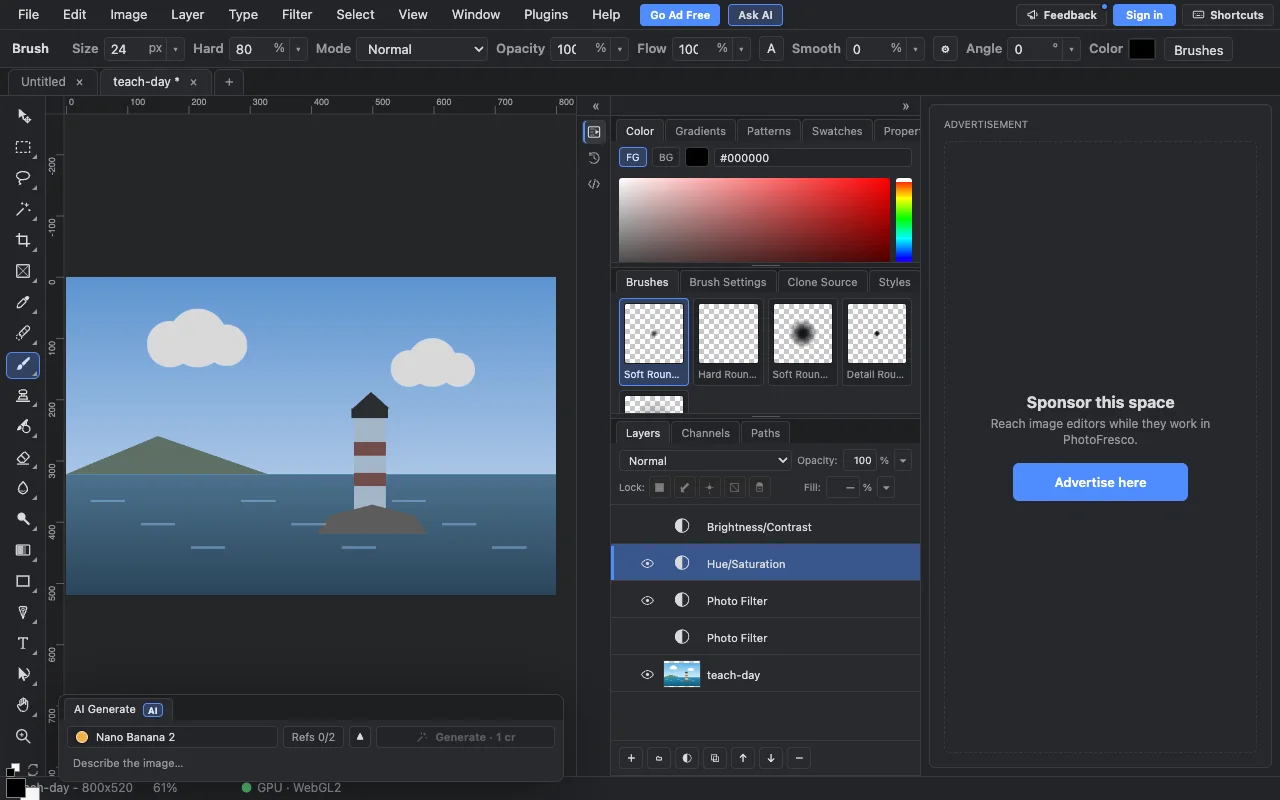
- Hide the warm layers. Add a cold version: a Photo Filter with blue (red 20, green 90, blue 200) and Density 0.4, then
Layer ▸ New Adjustment Layer ▸ Hue/Saturationwith Saturation -45 and Lightness -15. The same harbour now looks grey and quiet.
- Export both versions: show one set of layers, choose
File ▸ Export ▸ Export As…and save a PNG, then show the other set and export again. Save a PSD withFile ▸ Save As…so all the layers stay.
Example task (student sheet)
Task: one picture, two stories.
- Make a warm version and a cold version of the same picture with adjustment layers.
- Give each version a headline (for example "A calm morning at the coast" and "Storm coming").
- Write three sentences: What changed in the picture? What did not change? Which headline fits which version, and why?
Check yourself: Can you hide your adjustment layers and get the original back?
Discussion questions
- Which version feels safer? Which feels more serious? Which words in your head changed?
- The scene is the same in both. What does that tell you about how much a picture can "prove"?
- Where do you see edited pictures in everyday life (adverts, social media, news sites)? Which edits are harmless and which could mislead?
- If you saw a picture and did not know it had been edited, how could you check?
- What should a person who publishes pictures tell their readers about editing?
Differentiation
- Starters: use the given slider values and the practice image. Fill in the headline and the three sentences with sentence starters.
- On level: choose their own values and write the three sentences without help.
- Advanced: use a third adjustment (for example Black & White) and write about how three versions change the message, or find a real edited picture from an advert and describe which adjustments you think were used and what they do.
Check understanding
- What does an adjustment layer do, and why is that better than changing the picture directly?
- How do you get the original look back?
- Name one way colour can change how a picture feels.
Links
- Layers, masks and selections for the full list of adjustment layers
- Lesson: photo montage with layers and a layer mask
- Lesson: cut out a plain background and make a poster
- For teachers
Last updated